Tuesday, March 30, 2010

pastry the lazy way

As I mentioned on Friday, my husband's grandmother, MD, visited with us over the weekend. She is by FAR the coolest grandma I've ever met (we took her to get her nose pierced for Christmas last year if that's any indication) and I treasure having her around since losing both of my grandmothers years ago. Well, I wanted to shower her with all kinds of homemade goodies from my kitchen - including a show-stopping chocolate-glazed Napoleon - when she was up north. Despite all my planning and preparations, I didn't end up cooking a damn thing during her visit. I didn't even toast my own bagel.
We didn't have much time to spend with her so, we opted for pizza, beer and munchies instead of the spring feast I had planned. As much as I love cooking (especially for those I adore) I'm glad that I let go of my plans. The time that I would have been chopping, boiling, sauteing, and baking was spent laughing, joking, shopping, and catching up with her. Initially, I was a little disappointed that we wouldn't be having a proper dinner but, it was definitely time well spent. And you know what? Taking a little break from cooking was kinda nice. (There, I said it. Now don't tell my husband.)
Come Sunday though, I was itchin' to get back in the kitchen. And since I already had all the ingredients, I decided to make that chocolate-glazed Napoleon in honor of MD. I took a few short-cuts to expedite the process and it was still a project-- but the results were well worth it. My quick 'n dirty Napoleon doesn't even compare to Martha's exquisitely assembled pastry - in fact, my rushed assembly mixed with crappy lighting makes this treat look rather sloppy - but don't be fooled. It was a-freakin-mazing. One bite oozing with pastry cream, and I'm sure you'd agree.


Lazy Lady's Chocolate-glazed Napoleon


{adapted from Martha Stewart Living Annual Recipes 2003}

Serves: 4 - 6

Ingredients:
  • 1 package frozen pre-made puff pastry dough, thawed
  • 1/3 cup heavy cream
  • 2 1/2 ounces semisweet chocolate, coarsely chopped
  • 1/2 teaspoon corn syrup
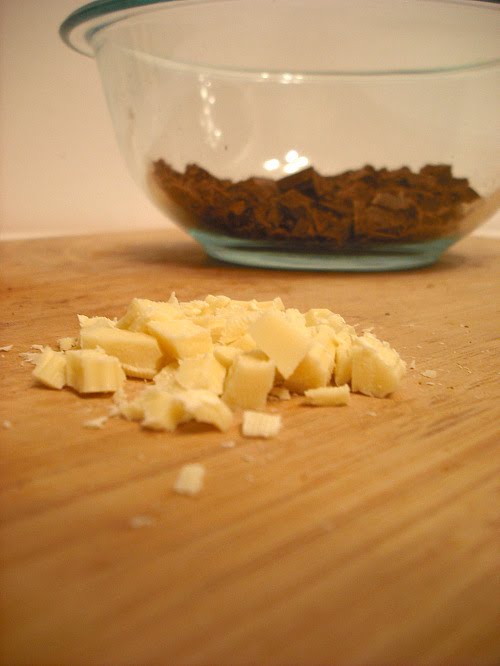
  • 1/4 ounce white chocolate, coarsely chopped
  • few drops of vegetable oil
  • pastry cream* (recipe follows)
1. Thaw both sheets of pastry dough as directed. Once thawed, you may flour a work surface and roll the dough out a bit if you like OR if you're a Lazy Lady like me, you can just cut each sheet of pastry in half (the resulting pastry will be thicker but, just as good). Take 3 of those 4 strips and lay them side by side on a large baking sheet (you'll have one strip of pastry leftover; wrap it, stick it back in the fridge and make some turnovers or empanadas with it later). Prick the dough all over with a fork, cover with plastic wrap and refrigerate for about an hour.

2. Preheat your oven to 425 F. Transfer the baking sheet to the oven and bake until the strips are puffed and golden all over, about 14 minutes. Set another clean baking sheet directly on top of the pastry strips and bake for another 6 minutes or so, until the pastry is cooked through and browned. Remove the second baking sheet and bake for an additional 4 minutes. Cool strips on a wire rack before trimming the edges of each piece. (Martha says to trim them to 4.5" x 12" but, so long as the pastry strips are uniform in size, it really doesn't matter.)

3. To make the chocolate glaze: bring the heavy cream just to a boil in a small saucepan. Put the chopped semisweet chocolate in a bowl and pour the hot cream over it; whisk until the chocolate is completely melted and the mixture is combined. Whisk in the corn syrup. Set aside. (Martha says to strain the glaze through a fine mesh sieve but I didn't bother with it and my glaze was fine. Oh, Martha and your frivolous steps...)

4. Place the chopped white chocolate and a drop or two of vegetable oil in a small resealable plastic bag. Microwave on high for 25 - 30 second intervals until the chocolate is melted-- you'll have to squish some of the chunks with your fingers to make sure it melts completely. Set aside.

5. Take the flattest strip of pastry and coat one side entirely in the chocolate glaze. Take your baggie of melted white chocolate, snip the corner of it with a pair of scissors and use your faux pastry bag to pipe thin lines across the width of the glazed pastry strip, a little less than an inch apart. If you like, you can create the distinctive flourish design by dragging a tooth pick, skewer or tip of a knife lengthwise through the white chocolate stripes in alternating directions. Or you can skip this step completely and just go with the chocolate glaze. Your call.

6. Assemble your Napoleon: start with one strip of unglazed pastry, top with half of the pastry cream and spread evenly over the strip leaving a slight border all around. Top with the second unglazed pastry strip and repeat with the remaining cream. Top with the glazed strip of pastry. Chill for about 30 minutes if you can stand it (we couldn't!). Use a long serrated knife to cut into 4 to 6 pieces - the cream will undoubtedly ooze out but it won't matter. Serve & enjoy!


*Pastry Cream
(makes about 4 cups)

Ingredients:
  • 1/4 cup plus 1 tablespoon cornstarch
  • 1/4 cup plus 1 tablespoon all-purpose flour
  • 1 cup sugar
  • 1/2 teaspoon salt
  • 3 large eggs
  • 4 cups milk
  • 2 tablespoons chilled unsalted butter, cut into small pieces
  • 1 1/2 teaspoons pure vanilla extract
1. Ready an ice bath and set aside. In a medium bowl, combine the cornstarch, flour, 1/2 cup sugar, and salt, and stir to mix. In another medium bowl, whisk the eggs until smooth. Add the flour mixture into the egg mixture and whisk to combine.

2. In a medium saucepan, combine milk and remaining 1/2 cup sugar. Bring the mixture to a boil over medium heat, stirring until the sugar is dissolved. Remove from heat. Slowly pour into the egg mixture, whisking constantly.

3. Transfer mixture to a clean saucepan set over medium heat. Bring to a boil, whisking constantly until the mixture has thickened, about 3 minutes.

4. Transfer mixture to a large heat-proof bowl. Whisk in the butter and vanilla, and set the bowl in the ice bath, stirring occasionally until chilled (about 10 minutes). Cover finished pastry cream with plastic wrap, pressing it directly onto the surface to prevent a skin from forming. Refrigerate until ready to use (no more than a day, or else it may become thin and runny).


 Luscious vanilla cream, sandwiched in between layers of flakey pastry and glazed in chocolate: a decadent take on this classic French treat and worth every bit of effort. x

Friday, March 26, 2010

Friday at last!


The weekend is here, hooray! Though it won't be quite as spring-y here as this pretty daffodil in my mom's window might lead you to believe. Six days into the season and its snowing as I type. Ah, New England.

In any event, I'll be hosting my husband's grandmother for the weekend. I can't wait to see her, she is such a hoot! She's also a big fan of my limited culinary skills so, I'm whipping up a spring feast in her honor: gemelli with basil, lemon and parmesan, seared local sea scallops with a little lemon butter and a chocolate-glazed Napoleon for dessert. 

We always treat her with similar Napoleons from a fantastic French bakery called Mon Delice when we visit her in Florida (if you're ever near New Smyrna Beach, definitely check it out! You won't be sorry!). I can't wait to surprise her with a homemade version of her favorite pastry. The perfect excuse to emerge from my Baking Ban :-)

Have a good one & I'll see you next week!
x

Thursday, March 25, 2010

MS baking printables

Martha, Martha, Martha.
I know there are wide-ranging opinions on the reigning Queen of Domestic Goddesses and personally, I fall somewhere in the middle. I think that some of her projects are completely and utterly frivolous. I mean, did you see all those glitter crafts?! There's even a whole section devoted exclusively to using the "herpes of crafting". I know she's trying to promote her new glitter line but, who wants to paint a portrait of their cat in glitter? Seriously?

Fortunately, Martha and her amazing team of crafty mavens are also responsible for some truly fantastic recipes (check out the Light General Tso's chicken under 'recipe recommendations' ovah there yonder ----> ), brilliant ideas and helpful tidbits, like these *free* baking printables.

In addition to being super cute, these printables pull their weight around the kitchen, making those pesky measurement conversions and search for baking temperatures a snap. You can print out and laminate them for safe keeping in your recipe stash, or convert them into refrigerator magnets for a reference that's easily accessible. The perfect cheat sheets for manic bakers like myself.

You can find instructions and downloadable templates here:

*pie chart

*cook's helpers (there are 3: measuring equivalents, pan substitutions & candy-making temperatures)

I feel my self-imposed Baking Ban may have to be lifted sooner rather than later. x


{images: Martha Stewart}

Tuesday, March 23, 2010

second chance smoothies

I'll be completely honest with you: up until a few days ago, I was NOT a smoothie person. The few that I had tried never impressed me and the thought of replacing a precious meal with blended anything was less than appetizing. The addition of yogurt into smoothies, popular though it may be, really did not appeal to me either as I am not big on dairy (or really, dairy is not big on me).

I recently came to find out via Joy of Cooking that -traditionally- smoothies don't include dairy products at all! (Oh, snap!) They're actually made with fruit flesh and juice, and are thickened with frozen fruits, creamy bananas or ice (rather than yogurt, milk or ice cream). In fact, dairy-based blended drinks aren't smoothies at all-- they're technically milkshakes. I'd been so mislead by popular juice bars and chain coffee shops that I claimed to dislike something that I had really never tried. For shame!

And so, I gave smoothies a second chance. My husband (also a former Smoothie Hater) and I had a lot of fun last weekend making our own personalized concoctions with frozen peaches, strawberries, and blueberries, and some sweet-tart lemonade. I can't believe I'd held out for so long, 'cause this was YUM. As in, good enough to replace your current breakfast kind of yum. Or even, good enough to replace that snack cake you've been eyeing kind of yum.

Consider this my PSA for *real* Smoothies.


Old School Smoothies

Total time: 5 minutes, if that
Serves: 1
 Ingredients:
  • 1 heaping cup of frozen fruit (I used 3/4 cup strawberries with 1/4 cup peaches, and 3/4 cup blueberries with 1/4 cup strawberries)
  • 1 cup of chilled lemonade (or other juice)
Add frozen fruit pieces and lemonade into a blender, and blend until smooth.
Notes: The more fruit you add, the thicker your smoothie will be. I made a thicker version and a juicier version; though I prefer thick, both were delicious. Also, the blueberries tend to be more watery than other frozen fruits and the skins look chunky when blended -- but they're still a great tasting addition to any smoothie.
Don't restrict yourself to this recipe! Have fun mixing and matching your favorite fruits, juices, and add-ins like a drizzle of honey, a scoop of sorbet or a shot of rum. There's a smoothie for any time or anyone... even picky, fruit-loathing husbands. x

Tuesday, March 16, 2010

springin' ahead

Though it may not feel like it around my neck of the woods, spring is almost here. Before I know it, all those bulb flowers will be blooming in soft pastel hues, the forsythias will come alive with buds as bright as sunshine... and the dreaded barrage of pollen will be covering unsuspecting victims in a horrid yellow-green film and irritating sinuses everywhere. Ahh, spring.


All kidding aside, I am really looking forward to warmer days, extra hours of daylight and the influx of wonderful warm-weather produce into local markets. Part of my New Year's goal was to experiment with new-to-me ingredients and to eat more seasonally so, I've finally got some new items to work with. Not that citrus fruits and squashes aren't great, I'm just ready for something different. Peas and mushrooms and strawberries, oh my!

I found this nifty printable mini spring produce chart which, is a great little resource that fits right into your wallet or pocket, perfect for those fruitless (pun somewhat intended) trips to the grocery store. To see what's growing near you during any time of the year, try the NRDC's Eat Local gadget (try it, its fun!). Eating seasonally and locally is not only more sustainable but, you end up with the freshest produce possible. Its a win-win really.


So what spring goodies are you most looking forward to? x

Wednesday, March 10, 2010

a sweet revelation: succulent citrus salad

I've been pretty tense lately adjusting to my new work environment. After 7 years in my former office, I knew it would be a difficult transition and it sure has had its challenges. I've been dealing with it mostly by indulging in my greatest weaknesses: coffee and sweets (and shopping but, we won't go there).

I had been keeping up with eating right and exercising so well up until this point, and I'm not too pleased that I've fallen back into this routine of using caffeine and sugar as a means to get through the day. My brain really hammered the point home the other night, when I dreamt that I was sitting on the floor in my pajamas, eating heaping wooden spoonfuls of raw sugar out of a burlap sack. I didn't want to eat it, yet I kept shoveling the sticky, gritty sweetness into my mouth. Talk about a wake-up call.

So, I've shelved my plans for a New York style cheesecake indefinitely (sadface) and I'm taking a break from dessert baking for now. I know that once those luscious summer berries come back into season I definitely won't be able to resist the tart, pie, crisp and crumble possibilities but, I'm going to do my best to be good until then. I'm looking at it more like an opportunity to further explore the realm of healthy, delicious eating... and less like masochism.


Over the weekend I remembered this beautiful citrus salad that I featured last month and decided to make my own version. I used Agave nectar which, is a sweetener procured from the beautiful spikey plants that also provide the basis for tequila (a fabulous plant indeed). Its also a great alternative to honey or maple syrup because its less viscous and less of it is required to achieve the same level sweetness (it was indispensable to me during my gluten- and sugar-free detox!). It was the perfect "dressing" for the juicy sections of grapefruit and orange.

This salad definitely satisfied my sweet spot -- which is a fairly bold statement coming from a Chocoholic slash Pastry Addict like me. Trust me.


Citrus Salad with Agave Nectar


Total Time: 10 minutes
Serves: 1-2

Ingredients:
  • 1 medium orange
  • 1 medium pink grapefruit
  • 2-4 fresh mint leaves, thinly sliced
  • Agave nectar, to taste (I used less than 2 tablespoons)
Supreme the orange and grapefruit. {If you've never done this before, check out Marichelle's simple how-to. Its easy, I promise.}  Place the citrus sections into a small bowl, sprinkle with mint strips, drizzle with Agave and toss lightly to combine. Serve immediately.


So simple, so fresh, and so sweet. Like eating a bowl of summer. It was just what the doctor ordered. x

Monday, March 8, 2010

back like a vertebrae

hey there, remember me? long time no see! so, um... its March. when did that happen?!?

well, the long story short of my recent absence is that:

1.) my office was relocated to another town and I subsequently had to break down, move & re-set up all of my office stuff in a new location with another company over a series of two weeks,

2.) I have been ridiculously busy, anxious and drained because of #1,

and 3.) I currently have no internet connection at home or in my new office.

needless to say, I haven't had much time to think or cook for fun or play with photos, let alone gather my thoughts into an intelligible and cohesive post. I have been writing - like, you know, with a pencil on paper (how old fashioned of me) - and working on lots of blog-related goodness, though being away from all my fave blogs and sites out there has been torture. I feel so out of the loop! luckily, crazy life things should be settling down soon and I can resume a semi-regular posting schedule here. I actually worked on some of my own recipes last weekend, and I can't wait to share them with you.

in the meantime, I am beyond thrilled to reveal my brand-spankin'-new blog banner, created by the lovely & talented Emily Pritchard. she is an absolute gem and has all sorts of amazing things in her Etsy shop: custom portraits, original artwork, and of course, blog banners. be sure to check her out! and thanks again Emily! :o)