Sunday, September 4, 2011

s'more please


Labor Day weekend is already here and summer is winding down, le sigh. This season always goes by too quickly, it seems. I'm determined to make to most of these remaining warm days, though, and what better way to commemorate summer than with a s'more? Or -better yet- a s'mores tart?

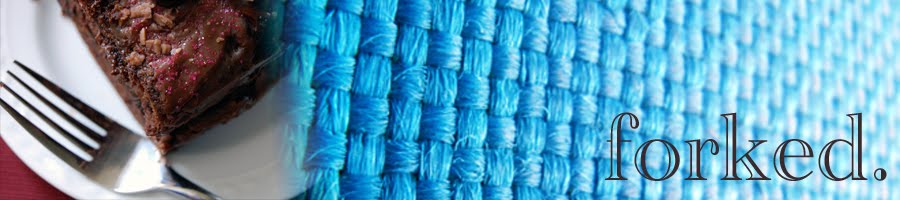
A crunchy graham cracker crust with decadent chocolate ganache filling, and a toasty marshmallow top-- my ode to the quintessential summer treat. This is a dressed up version of a childhood favorite, perfect for any end-of-summer BBQ, cookout or picnic you may be headed to.


S'mores Tart

Ingredients:

For the crust--
  • ~12 graham crackers, crushed (1 1/2 cups)
  • 3 tablespoons sugar
  • 1/4 teaspoon salt
  • 5 tablespoons unsalted butter, melted
For the filling--
  • 12 ounces semisweet or milk chocolate chips
  • pinch of salt
  • 1 1/4 cup heavy cream
For the topping--
  • ~half a 10 ounce bag of marshmallows, cut in half

Preheat the oven to 350 degrees.

Combine the graham cracker crumbs, sugar, salt and melted butter in a medium bowl and mix until evenly moistened. Pour the crumb mixture into a 9- or 10-inch spring-form or tart pan. Press the crumbs evenly over the bottom and up the sides of the pan (a flat-bottomed glass or measuring cup works well for this). Bake the crust for 10 - 12 minutes, or until set and golden. Cool it completely before filling.

Place the chocolate chips and a pinch of salt in a medium bowl. Bring the cream to a bare simmer over medium-low heat, and pour the hot cream over the chocolate. Allow to sit for about a minute, and then whisk until smooth. Pour the chocolate mixture into the cooled crust, and let it firm up in the fridge (about 30 minutes).

Preheat your broiler. Arrange the halved marshmallows across the top of the tart and place under the broiler for about 1 minute, or until the marshmallows are toasted and lightly browned. Allow the tart to set again in the fridge for another 20 minutes so that it cuts more easily. Serve and enjoy!


x

Sunday, July 10, 2011

a summer strawberry revival


Well, it happened again. I went another 3 months without a peep. I thought about posting (really, I did!) but, life has once again gotten in the way. Eh, well.

After a Father's Day outing to a fantastic local pick-your-own farm, we returned home with a bounty of gorgeous sweet strawberries and I was totally inspired. I mulled over what would become of my little red treasures for a while before settling on jam. I'd never made any jam before and this seemed like the perfect way to stretch the juicy sweetness of these amazing berries as much as humanly possible.

Not having made jam before, I was naturally a bit intimidated by this task. All those fears melted away when I discovered instant pectin that required NO cooking whatsoever (BOOYAH). This jam could honestly not be simpler and is so freakin' delicious. No cooking + no canning = amazingly fresh and fruity homemade jam that keeps for a month (or up to a year!). WIN.


No-cook Strawberry Jam

{Recipe right off the Ball Instant Pectin package}

 
Ingredients:
  • 1 package (1.59 oz.) Ball Instant Fruit Pectin
  • 1 1/2 cups granulated sugar
  • 4 cups crushed strawberries
In a large bowl, stir the sugar and pectin together until well blended. Add the crushed strawberries and continue to stir for 3 minutes. Ladle the mixture into clean containers of your choice (I couldn't resist these plastic Ball jars- how cute!) and allow the jam to set for 30 minutes. Use your delicious jam now -- on warm cream biscuits, layered into a cake, in thumb-print cookies or just smeared on plain old toast. You can also stash it in the refrigerator (3 weeks) or freezer (up to a year).


x

Sunday, March 6, 2011

gone granola

In the weeks leading up to my son's birth, I filled my days with LOTS of baking projects. In an attempt to break the pattern of cookies, cookie bars and other sugary indulgences, I decided to finally tackle something I'd been meaning to make for a long time: homemade granola. Its been one of those things that I hate buying --because I know I can make something better at home-- yet my laziness and uncanny ability to procrastinate always got in the way. No more! This granola is so ridiculously easy to make, and so much more delicious than any store-bought variety, that I am hereby refusing to buy it. For reals. 


Honey Pecan Granola

{Recipe adapted from Everyday Food}

Makes about 4 1/2 cups.

Ingredients:
  • 3 cups rolled oats
  • 1 1/2 cups coarsely chopped pecans
  • 3 tablespoons unsalted butter, melted
  • 1/3 cup honey
  • 1/2 teaspoon coarse salt
  • handful of raisins
  • handful of dried cranberries

Preheat the oven to 300 degrees. Combine the oats, pecans, butter, honey and salt in a large bowl, and mix until well coated. Transfer the mixture to a baking sheet lined in parchment paper and spread out evenly. Bake about 30 minutes or until lightly golden, making sure to stir halfway through. After cooling completely on the sheet, add in your raisins and cranberries. Enjoy your granola now or store in an air-tight container for up to 3 weeks.

Of course you can swap out pecans for another nut of your choice and add in any ol' thing you like-- dried fruit, chocolate chips, whatever. If you want a completely nut-free version, just add an additional cup of oats to the mix. x 


Tuesday, January 25, 2011

rising to the occassion: my first yeast dough

Oh hi, 2011. Nice of you to creep up on me like that.

Well, since its a new year and I've got time to kill until our little bundle arrives, I thought I'd work on my culinary goals list that I started last year (I've found that on-going goals are a lot more realistic and attainable than traditional resolutions, and I'm a procrastinator by nature so time constraints don't work for me). Since I've conquered things like making *good* pie crust from scratch and boiling my own lobster (so what if I cried!), I decided to go for something I'd been putting off for a long time: making my own yeast dough for bread. 

I don't know why I was so intimidated by these fabulous little micro-organisms, 'cause this dough was super easy to make and produced a fantastic focaccia bread. So chewy and buttery, and absolutely irresistible when served warm. These are only the first of what I hope to be many loaves of delicious homemade flatbread created this year.


Focaccia bread

{Recipe adapted from JOY of Cooking}

Makes: 2  8-9 inch loaves

Ingredients:
  • 1 1/3 cups warm water (105 - 115 degrees F)
  • 1 package of active dry yeast (2 1/4 teaspoons)
  • 3 1/2 to 3 3/4 cups all-purpose flour
  • 2 tablespoons olive oil, plus more for drizzling
  • 1 tablespoon salt
  • toppings of your choice
In a large bowl, combine the warm water and yeast until it is dissolved, about 5 minutes. Add the flour, olive oil, and salt to the dissolved yeast and mix by hand or on a low mixer speed for about 1 minute. Knead the dough for about 10 minutes by hand (or with a dough hook on low to medium speed, if you're lucky enough to have one of those amazing stand mixers) until the dough is smooth and elastic. 

Lightly grease a bowl with olive oil and transfer the dough to the bowl, turning it once to coat. Cover the bowl with plastic wrap or a clean cloth and allow it to rise in a warm spot (75-85 degrees F is best) until it has doubled in volume (about 1 to 1 1/2 hours).

Divide the dough in half and roll or pat each piece out to a 1/2-inch thick disc. Transfer the dough discs to two well-oiled 8 or 9-inch cake pans (round or square will do), and allow them to rise, covered in oiled plastic wrap, for an additional 1 1/2 hours.

Preheat the oven to 400 degrees. Make indentations all over the surface of the dough with your fingertips, then drizzle with olive oil and top with whatever your heart desires: grated cheeses, dried herbs, coarse salt, olives, grapes, sun-dried tomatoes, sauteed onions, whatever floats your boat (I used grated Parmesan cheese on one loaf, and a combination of rosemary and sea salt on the other, and both came out fabulous).

Bake for about 25 minutes or until the loaves are golden brown. Remove from the cake pans to a rack. Serve warm or at room temperature, as is, cut into wedges or sliced in half and then open horizontally to use as sandwich bread. Its also wonderful enjoyed with flavored olive oil for dipping. x   

Tuesday, November 9, 2010

easy-peasy pie

Its seems as though I've gone through a distinct Pie Baking Stage in my pregnancy, whereby I put on my Big Girl panties, conquered my culinary fears and made my very own butter pie crust dough -or pate brisee, if you're feelin' fancy- from scratch. Not a big deal to some but, I had cleared a major kitchen hurdle with great success and I was proud. And you know what? It wasn't all that hard to make-- it just required a bit of patience (another post for another day).


Its always good to have a fantastic dessert recipe for those occasions when you are short on patience, though, and this is mine. My Nana's Swedish apple pie. All the sumptuous slow-baked flavor of a more traditional pie with the minimal effort of a crisp. The best part? Its crustless. That's right- no pastry cutters, rolling pins or dough-chilling required. It only takes an hour to get from apple peelin' to pullin' that golden delicious creation from the oven. Perfect for upcoming family holiday gatherings where you might not have the time, patience or sanity to make one of those tasty-but-time-consuming-double-crusted jobs.


Swedish Apple Pie

Serves: 6 - 8 (or 1 - 2 very hungry pregnant women)

Ingredients:

For the filling--
  • 3 - 5 apples (or enough to fill 2/3 of your pie plate), peeled and sliced*
  • 1 tablespoon sugar
  • 1 tablespoon brown sugar
  • 1 teaspoon ground cinnamon
  • a squeeze of fresh lemon juice
For the topping--
  • 6 tablespoons butter, softened
  • 1 cup sugar
  • 1 cup all-purpose flour
  • 1 egg
  • 1/2 cup chopped walnuts

*Using a mixture of different types of apples is always a good idea to get a balance of flavor and texture in any apple pie. Tart and crisp + sweet and soft = awesome pie, every time.

Preheat the oven to 350 degrees. Toss the apple slices with the sugar, brown sugar, cinnamon and lemon juice, and spread into an ungreased 8-inch baking dish or pie plate. If you're really in a pinch and don't have any fresh lemons hanging around, a splash of orange juice works just as well.

Mix all the topping ingredients together until well combined but, still crumbly (it should stick together when you pinch it). Crumble the topping evenly over the apples and pat down lightly (but not too much-- the crust has a better texture when not smoothed down, in my humble opinion). 

Bake for 45 minutes or until the top is golden and the juices are a-bubblin'. Best served warm with a scoop of your favorite vanilla ice cream. 


Possibly not as pretty as a rolled dough pie but, certainly just as delicious. x   
          

Friday, October 22, 2010

lacking inspiration


I've been feeling rather uninspired lately. The pregnancy hormones have a funny way of causing my creative ambition to wax and wane at will, in no discernible or predictable pattern. One week I couldn't stop baking pies, and the next week I'm feeling rather 'meh' towards creative projects in general. Hmph. Normally I'd just flip through a favorite magazine or put a few pretty blooms (like these late-summer zinnias I snipped a few weeks ago) around to perk myself up but, they're just not cutting it.

There are a few places 'round the interwebs that I love to check out when I'm in an uninspired funk such as this, and I thought I'd share 2 of my favorites with you on this lovely Friday.

Geninne's Art Blog. I've mentioned Geninne here before but, her blog is so creative and vibrant that it is worth mentioning again. She always posts such amazing photos - whether they're of her most recent painting endeavor, glimpses of her beautiful home or her astoundingly gorgeous Mexican surroundings. And if her blog gets you in a creative mood, she's got all sorts of tutorials and patterns to get you started.

A Creative Mint. Leslie never ceases to inspire me with her beautifully photographed vignettes. She creates various scenes around color themes and uses all sorts of materials to convey them - from flowers to fabric to magazine clippings to ceramics and beyond. Just lovely stuff. She also shares some really helpful tips on floral arranging using inexpensive flowers and vessels you may already have (which is wonderful for clueless people like myself). 

Are there any places that you go to for creative inspiration? Do share! x 


Wednesday, October 6, 2010

savoring summer: simple bruschetta


The last of our summer garden's cherry tomatoes. Sigh.

As much as I love fall, I'm having a hard time letting go of summer this year (maybe because I spent a good portion of it feeling overly nauseated and generally dead-to-the-world?). But alas, the leaves are changing, the air is crisp and my mom has already made half a dozen apple pies-- fall is officially upon us. So, its time to savor those last few seasonal veggies out of the garden.

These being the last few home-grown tomatoes - and gorgeous, perfectly ripe ones at that - I wanted to use them in a dish where their delicate flavor would be front and center. A humble, rustic bruschetta instantly came to mind. Simply dressed in balsamic vinegar and olive oil, and lightly seasoned with garlic and basil, it was the perfect way to honor these last little beauties.


Simple Bruschetta


{I never use exact measurements when making bruschetta so, adjust the amounts and ingredients to your liking.}

Ingredients:
  • pint of cherry or grape tomatoes, quartered
  • 1 small clove of garlic, finely minced
  • good olive oil, for drizzling
  • balsamic vinegar, for drizzling
  • pinch of dried basil OR 1-2 small fresh basil leaves, sliced into ribbons
  • loaf of crusty bread (I used an asiago demi loaf this time around but any French or Italian loaf will do-- use what you have on hand)
Preheat the oven to 400 degrees. Slice bread into ~1/2 inch rounds and arrange on a cookie sheet. Drizzle or brush lightly with olive oil and toast in the oven for 5 to 8 minutes, or until the edges are golden.

Meanwhile, dress the tomatoes with olive oil, balsamic, garlic and basil to taste in a small bowl, and toss to combine. Spoon tomato mixture over the toasts and enjoy.

A simple bruschetta like this makes a perfect no-fuss appetizer any time of year but, I love it even more as a light, healthy, I'm-sick-of-sandwiches lunch. x