Sunday, September 4, 2011

s'more please


Labor Day weekend is already here and summer is winding down, le sigh. This season always goes by too quickly, it seems. I'm determined to make to most of these remaining warm days, though, and what better way to commemorate summer than with a s'more? Or -better yet- a s'mores tart?

A crunchy graham cracker crust with decadent chocolate ganache filling, and a toasty marshmallow top-- my ode to the quintessential summer treat. This is a dressed up version of a childhood favorite, perfect for any end-of-summer BBQ, cookout or picnic you may be headed to.


S'mores Tart

Ingredients:

For the crust--
  • ~12 graham crackers, crushed (1 1/2 cups)
  • 3 tablespoons sugar
  • 1/4 teaspoon salt
  • 5 tablespoons unsalted butter, melted
For the filling--
  • 12 ounces semisweet or milk chocolate chips
  • pinch of salt
  • 1 1/4 cup heavy cream
For the topping--
  • ~half a 10 ounce bag of marshmallows, cut in half

Preheat the oven to 350 degrees.

Combine the graham cracker crumbs, sugar, salt and melted butter in a medium bowl and mix until evenly moistened. Pour the crumb mixture into a 9- or 10-inch spring-form or tart pan. Press the crumbs evenly over the bottom and up the sides of the pan (a flat-bottomed glass or measuring cup works well for this). Bake the crust for 10 - 12 minutes, or until set and golden. Cool it completely before filling.

Place the chocolate chips and a pinch of salt in a medium bowl. Bring the cream to a bare simmer over medium-low heat, and pour the hot cream over the chocolate. Allow to sit for about a minute, and then whisk until smooth. Pour the chocolate mixture into the cooled crust, and let it firm up in the fridge (about 30 minutes).

Preheat your broiler. Arrange the halved marshmallows across the top of the tart and place under the broiler for about 1 minute, or until the marshmallows are toasted and lightly browned. Allow the tart to set again in the fridge for another 20 minutes so that it cuts more easily. Serve and enjoy!


x

Sunday, July 10, 2011

a summer strawberry revival


Well, it happened again. I went another 3 months without a peep. I thought about posting (really, I did!) but, life has once again gotten in the way. Eh, well.

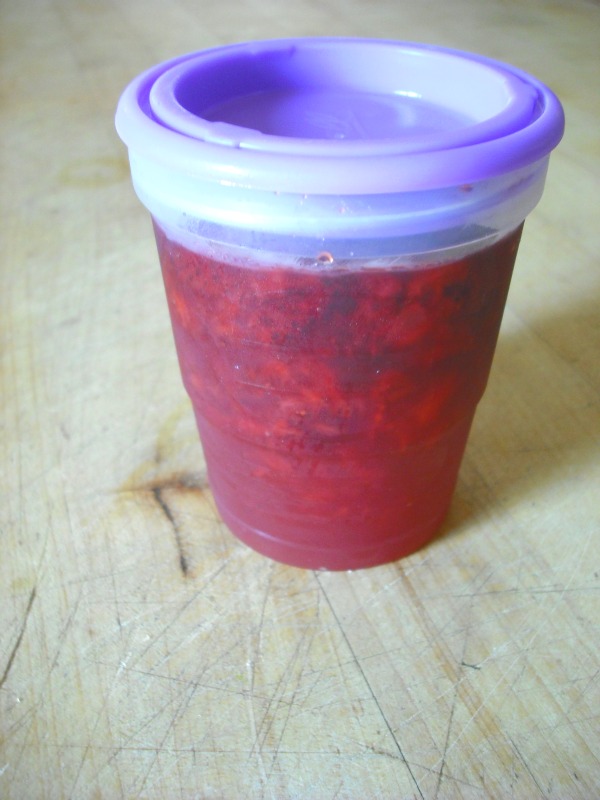
After a Father's Day outing to a fantastic local pick-your-own farm, we returned home with a bounty of gorgeous sweet strawberries and I was totally inspired. I mulled over what would become of my little red treasures for a while before settling on jam. I'd never made any jam before and this seemed like the perfect way to stretch the juicy sweetness of these amazing berries as much as humanly possible.

Not having made jam before, I was naturally a bit intimidated by this task. All those fears melted away when I discovered instant pectin that required NO cooking whatsoever (BOOYAH). This jam could honestly not be simpler and is so freakin' delicious. No cooking + no canning = amazingly fresh and fruity homemade jam that keeps for a month (or up to a year!). WIN.


No-cook Strawberry Jam

{Recipe right off the Ball Instant Pectin package}

 
Ingredients:
  • 1 package (1.59 oz.) Ball Instant Fruit Pectin
  • 1 1/2 cups granulated sugar
  • 4 cups crushed strawberries
In a large bowl, stir the sugar and pectin together until well blended. Add the crushed strawberries and continue to stir for 3 minutes. Ladle the mixture into clean containers of your choice (I couldn't resist these plastic Ball jars- how cute!) and allow the jam to set for 30 minutes. Use your delicious jam now -- on warm cream biscuits, layered into a cake, in thumb-print cookies or just smeared on plain old toast. You can also stash it in the refrigerator (3 weeks) or freezer (up to a year).


x

Sunday, March 6, 2011

gone granola

In the weeks leading up to my son's birth, I filled my days with LOTS of baking projects. In an attempt to break the pattern of cookies, cookie bars and other sugary indulgences, I decided to finally tackle something I'd been meaning to make for a long time: homemade granola. Its been one of those things that I hate buying --because I know I can make something better at home-- yet my laziness and uncanny ability to procrastinate always got in the way. No more! This granola is so ridiculously easy to make, and so much more delicious than any store-bought variety, that I am hereby refusing to buy it. For reals. 


Honey Pecan Granola

{Recipe adapted from Everyday Food}

Makes about 4 1/2 cups.

Ingredients:
  • 3 cups rolled oats
  • 1 1/2 cups coarsely chopped pecans
  • 3 tablespoons unsalted butter, melted
  • 1/3 cup honey
  • 1/2 teaspoon coarse salt
  • handful of raisins
  • handful of dried cranberries

Preheat the oven to 300 degrees. Combine the oats, pecans, butter, honey and salt in a large bowl, and mix until well coated. Transfer the mixture to a baking sheet lined in parchment paper and spread out evenly. Bake about 30 minutes or until lightly golden, making sure to stir halfway through. After cooling completely on the sheet, add in your raisins and cranberries. Enjoy your granola now or store in an air-tight container for up to 3 weeks.

Of course you can swap out pecans for another nut of your choice and add in any ol' thing you like-- dried fruit, chocolate chips, whatever. If you want a completely nut-free version, just add an additional cup of oats to the mix. x 


Tuesday, January 25, 2011

rising to the occassion: my first yeast dough

Oh hi, 2011. Nice of you to creep up on me like that.

Well, since its a new year and I've got time to kill until our little bundle arrives, I thought I'd work on my culinary goals list that I started last year (I've found that on-going goals are a lot more realistic and attainable than traditional resolutions, and I'm a procrastinator by nature so time constraints don't work for me). Since I've conquered things like making *good* pie crust from scratch and boiling my own lobster (so what if I cried!), I decided to go for something I'd been putting off for a long time: making my own yeast dough for bread. 

I don't know why I was so intimidated by these fabulous little micro-organisms, 'cause this dough was super easy to make and produced a fantastic focaccia bread. So chewy and buttery, and absolutely irresistible when served warm. These are only the first of what I hope to be many loaves of delicious homemade flatbread created this year.


Focaccia bread

{Recipe adapted from JOY of Cooking}

Makes: 2  8-9 inch loaves

Ingredients:
  • 1 1/3 cups warm water (105 - 115 degrees F)
  • 1 package of active dry yeast (2 1/4 teaspoons)
  • 3 1/2 to 3 3/4 cups all-purpose flour
  • 2 tablespoons olive oil, plus more for drizzling
  • 1 tablespoon salt
  • toppings of your choice
In a large bowl, combine the warm water and yeast until it is dissolved, about 5 minutes. Add the flour, olive oil, and salt to the dissolved yeast and mix by hand or on a low mixer speed for about 1 minute. Knead the dough for about 10 minutes by hand (or with a dough hook on low to medium speed, if you're lucky enough to have one of those amazing stand mixers) until the dough is smooth and elastic. 

Lightly grease a bowl with olive oil and transfer the dough to the bowl, turning it once to coat. Cover the bowl with plastic wrap or a clean cloth and allow it to rise in a warm spot (75-85 degrees F is best) until it has doubled in volume (about 1 to 1 1/2 hours).

Divide the dough in half and roll or pat each piece out to a 1/2-inch thick disc. Transfer the dough discs to two well-oiled 8 or 9-inch cake pans (round or square will do), and allow them to rise, covered in oiled plastic wrap, for an additional 1 1/2 hours.

Preheat the oven to 400 degrees. Make indentations all over the surface of the dough with your fingertips, then drizzle with olive oil and top with whatever your heart desires: grated cheeses, dried herbs, coarse salt, olives, grapes, sun-dried tomatoes, sauteed onions, whatever floats your boat (I used grated Parmesan cheese on one loaf, and a combination of rosemary and sea salt on the other, and both came out fabulous).

Bake for about 25 minutes or until the loaves are golden brown. Remove from the cake pans to a rack. Serve warm or at room temperature, as is, cut into wedges or sliced in half and then open horizontally to use as sandwich bread. Its also wonderful enjoyed with flavored olive oil for dipping. x   

Tuesday, November 9, 2010

easy-peasy pie

Its seems as though I've gone through a distinct Pie Baking Stage in my pregnancy, whereby I put on my Big Girl panties, conquered my culinary fears and made my very own butter pie crust dough -or pate brisee, if you're feelin' fancy- from scratch. Not a big deal to some but, I had cleared a major kitchen hurdle with great success and I was proud. And you know what? It wasn't all that hard to make-- it just required a bit of patience (another post for another day).


Its always good to have a fantastic dessert recipe for those occasions when you are short on patience, though, and this is mine. My Nana's Swedish apple pie. All the sumptuous slow-baked flavor of a more traditional pie with the minimal effort of a crisp. The best part? Its crustless. That's right- no pastry cutters, rolling pins or dough-chilling required. It only takes an hour to get from apple peelin' to pullin' that golden delicious creation from the oven. Perfect for upcoming family holiday gatherings where you might not have the time, patience or sanity to make one of those tasty-but-time-consuming-double-crusted jobs.


Swedish Apple Pie

Serves: 6 - 8 (or 1 - 2 very hungry pregnant women)

Ingredients:

For the filling--
  • 3 - 5 apples (or enough to fill 2/3 of your pie plate), peeled and sliced*
  • 1 tablespoon sugar
  • 1 tablespoon brown sugar
  • 1 teaspoon ground cinnamon
  • a squeeze of fresh lemon juice
For the topping--
  • 6 tablespoons butter, softened
  • 1 cup sugar
  • 1 cup all-purpose flour
  • 1 egg
  • 1/2 cup chopped walnuts

*Using a mixture of different types of apples is always a good idea to get a balance of flavor and texture in any apple pie. Tart and crisp + sweet and soft = awesome pie, every time.

Preheat the oven to 350 degrees. Toss the apple slices with the sugar, brown sugar, cinnamon and lemon juice, and spread into an ungreased 8-inch baking dish or pie plate. If you're really in a pinch and don't have any fresh lemons hanging around, a splash of orange juice works just as well.

Mix all the topping ingredients together until well combined but, still crumbly (it should stick together when you pinch it). Crumble the topping evenly over the apples and pat down lightly (but not too much-- the crust has a better texture when not smoothed down, in my humble opinion). 

Bake for 45 minutes or until the top is golden and the juices are a-bubblin'. Best served warm with a scoop of your favorite vanilla ice cream. 


Possibly not as pretty as a rolled dough pie but, certainly just as delicious. x   
          

Friday, October 22, 2010

lacking inspiration


I've been feeling rather uninspired lately. The pregnancy hormones have a funny way of causing my creative ambition to wax and wane at will, in no discernible or predictable pattern. One week I couldn't stop baking pies, and the next week I'm feeling rather 'meh' towards creative projects in general. Hmph. Normally I'd just flip through a favorite magazine or put a few pretty blooms (like these late-summer zinnias I snipped a few weeks ago) around to perk myself up but, they're just not cutting it.

There are a few places 'round the interwebs that I love to check out when I'm in an uninspired funk such as this, and I thought I'd share 2 of my favorites with you on this lovely Friday.

Geninne's Art Blog. I've mentioned Geninne here before but, her blog is so creative and vibrant that it is worth mentioning again. She always posts such amazing photos - whether they're of her most recent painting endeavor, glimpses of her beautiful home or her astoundingly gorgeous Mexican surroundings. And if her blog gets you in a creative mood, she's got all sorts of tutorials and patterns to get you started.

A Creative Mint. Leslie never ceases to inspire me with her beautifully photographed vignettes. She creates various scenes around color themes and uses all sorts of materials to convey them - from flowers to fabric to magazine clippings to ceramics and beyond. Just lovely stuff. She also shares some really helpful tips on floral arranging using inexpensive flowers and vessels you may already have (which is wonderful for clueless people like myself). 

Are there any places that you go to for creative inspiration? Do share! x 


Wednesday, October 6, 2010

savoring summer: simple bruschetta


The last of our summer garden's cherry tomatoes. Sigh.

As much as I love fall, I'm having a hard time letting go of summer this year (maybe because I spent a good portion of it feeling overly nauseated and generally dead-to-the-world?). But alas, the leaves are changing, the air is crisp and my mom has already made half a dozen apple pies-- fall is officially upon us. So, its time to savor those last few seasonal veggies out of the garden.

These being the last few home-grown tomatoes - and gorgeous, perfectly ripe ones at that - I wanted to use them in a dish where their delicate flavor would be front and center. A humble, rustic bruschetta instantly came to mind. Simply dressed in balsamic vinegar and olive oil, and lightly seasoned with garlic and basil, it was the perfect way to honor these last little beauties.


Simple Bruschetta


{I never use exact measurements when making bruschetta so, adjust the amounts and ingredients to your liking.}

Ingredients:
  • pint of cherry or grape tomatoes, quartered
  • 1 small clove of garlic, finely minced
  • good olive oil, for drizzling
  • balsamic vinegar, for drizzling
  • pinch of dried basil OR 1-2 small fresh basil leaves, sliced into ribbons
  • loaf of crusty bread (I used an asiago demi loaf this time around but any French or Italian loaf will do-- use what you have on hand)
Preheat the oven to 400 degrees. Slice bread into ~1/2 inch rounds and arrange on a cookie sheet. Drizzle or brush lightly with olive oil and toast in the oven for 5 to 8 minutes, or until the edges are golden.

Meanwhile, dress the tomatoes with olive oil, balsamic, garlic and basil to taste in a small bowl, and toss to combine. Spoon tomato mixture over the toasts and enjoy.

A simple bruschetta like this makes a perfect no-fuss appetizer any time of year but, I love it even more as a light, healthy, I'm-sick-of-sandwiches lunch. x
  

Friday, September 17, 2010

octo-cutey

I call myself a guerilla crafter-- but not because of some political statement I'm trying to make through cardstock and hot glue. It takes a lot to motivate me to craft these days so, when I come across a project I deem worthy of my time, I strike aggressively and seemingly out of nowhere. And so it was with this cutey-patootie yarn octopus.


I came across this gem in the August issue of Martha Stewart Living and *knew* this was the project to bring me out of my crafting coma. The materials were easy enough - cotton yarn, scissors and a styrofoam ball, plus a little thread for the eyes. The instructions were simple, too. And with our little bundle on the way this winter, I thought this would be a lovely homemade token of Mama's love.

I'm happy with the way he turned out, though I think he could use a few touch ups and an accessory-- a bow tie perhaps? We shall see. You can find the step-by-step instructions for this little guy right here.

Have a great weekend! x 

Tuesday, September 7, 2010

summer on a stick


It was an absolutely gorgeous Labor Day weekend for us here in the Northeast US! And what better way to celebrate the long weekend than with a delicious grilled lunch, eaten outdoors and shared with family? Especially if the said meal combines all your summer favorites, and comes on a stick. Because everything is better on a stick (hot dogs, apples, ice cream-- think about it...).

Succulent shrimp, smokey sausage, creamy red potatoes and sweet local corn, married by a super-simple-but-super-delicious garlic herb butter, come together in these skewers of summer awesomeness and the flavors are just amazing. This is the stuff I'll be dreaming about during the dreary, snowy months of winter. Not that I'm thinking about winter yet.


Summer Shrimp Skewers
with Garlic Herb Butter

{Recipe adapted from Better Homes & Gardens}

Serves 4

Ingredients:
  • 12-15 fresh or frozen medium shrimp
  • 2 ears of fresh sweet corn
  • 1/2 pound baby red potatoes
  • 1/2 pound kielbasa (or other smoked sausage), cut into 1 inch pieces
  • 4 green onions, cut into 2-3 inch sections
  • olive oil, for brushing
  • salt & pepper to taste
  • garlic herb butter*, for serving

1. If you're using frozen shrimp, thaw, then remove shells and devein. Remove the husks and silks from the corn, and cut cobs into ~1 inch pieces. [Note: if you're using wooden skewers, the corn may be difficult -if not impossible- to skewer without almost stabbing yourself and/or snapping the skewer. If you don't have metal skewers, I would suggest breaking each ear in half and grilling them beside the skewers to save yourself the trouble.] Soak wooden skewers for at least 20-30 minutes.

2. Cook the potatoes, covered, in boiling salted water for 5 minutes. Add the corn, and cook for an additional 5 minutes or until the veggies are tender. Drain and set aside to cool slightly.

3. Thread your shrimp, sausage, potatoes, onions and corn (if you can manage it) among five or six 10-inch skewers. 

4. In a small bowl, combine some olive oil (more or less 1/4 of a cup) with salt and pepper to taste, and add any additional seasonings that float your boat. I used some garlic powder and a bit of paprika but you could use Old Bay, Italian seasoning, your favorite grilling rub, whatever you like. Brush the seasoned oil over the skewers (and corn, if grilling separately).

5. Grill skewers over medium-high heat for about 8 to 10 minutes or until your shrimp are bright pink and opaque, turning about half way through. Serve immediately with garlic herb butter, and lemon wedges if desired.

*Garlic Herb Butter

Melt approximately 1/4 cup butter with 1-2 minced garlic cloves over low heat. Allow the garlic-y goodness to permeate the melted butter for about 10 minutes, and add some fresh chopped herbs -like parsley straight out of the garden- right before removing from heat.

Dunk or drizzle your grilled skewers into the savory garlic butter, pour yourself a tall glass of lemonade and enjoy the rest of summer's bounty. x  


Monday, August 30, 2010

she lives! + Italian comfort cravings

Its certainly been a while, hasn't it? 3 months since my last post?!? Yeeesh.


The truth is, from the end of May to early August I'd been battling some pretty debilitating morning sickness. Happy and exciting news, yes, but not so much for my foodie appetite. I subsisted on crackers, popsicles and flat soda for weeks on end, and spent many many hours kneeling in front of my toilet in gory reunions with the aforementioned foods. I could NOT bare to eat, cook, smell, touch, shop for, look at, write about or even think about food. Needless to say, this did not make for interesting blog material.


The great news is that I'm finally into my second trimester, and food is my friend again! I can watch the Phantom Gourmet and flip through Everyday Food without running to the bathroom! I can eat and drink things besides ginger ale! Hallelujah! I've spent the past few weeks catching up on all my fave foodie blogs, maggies and shows, and it has been so nice. I've missed you guys! 


 I've been craving Italian food like its nobody's business and so, I thought I'd come back from the dead and share this fave recipe with ya'll. Baked ziti isn't a dish that would normally come to mind as a typical end-of-summer meal but, its definitely something to keep in mind for the cooler nights that are becoming more common as we ease into fall.


Baked Ziti

{Recipe adapted from Food Network Kitchens}

Serves: 6 - 8

Ingredients:
  • 1 pound dried tubular pasta (ziti, penne, rigatoni, etc.)
  • 3 1/2 cups quick tomato sauce* (recipe follows)
  • 1 pound fresh or shredded mozzarella cheese
  • 3/4 cup grated Parmesan cheese
  • salt & pepper

1. Preheat the oven to 400 degrees.

2. Cook pasta as directed until al dente, drain.

3. Toss the cooked pasta with the tomato sauce, a handful of shredded or cubed mozzarella, half the Parmesan and pepper to taste. Transfer mixture to an oiled 9 x 13 inch baking dish, and cover with the remaining mozzarella (thinly sliced if fresh) and Parmesan cheeses. Bake until lightly browned and hot, about 20 - 30 minutes. Serve immediately.


*Quick Tomato Sauce

Yields: about 5 cups

Ingredients:

  • 2 tablespoons extra-virgin olive oil

  • 1 pound sweet or spicy Italian sausages, casings removed and crumbled

  • 1/4 of a medium onion, diced

  • 3 cloves of garlic, chopped

  • 3 1/2 cups (one 28 oz. can) whole, peeled canned tomatoes in puree, roughly chopped

  • sprig of fresh thyme

  • sprig of fresh basil

  • salt & pepper
Heat the oil in a medium saucepan over medium-high heat. Cook the sausage until just beginning to brown, then add the onion and garlic, and continue to cook until sausage is browned and onions are soft. Add the tomatoes and herbs, and bring mixture to a boil. Lower the heat, cover and simmer for about 10 minutes. Discard the herb sprigs, season with salt and pepper to taste. If not using immediately, sauce keeps covered for up to 3 days in the refrigerator or 2 months in the freezer.

Feel free to customize this recipe to your liking. I've used chicken sausages, ground meat (beef, chicken, turkey), dried herbs, and homemade marinara sauce in different variations and they're all great. You could also add sauteed veggies, sliced meatball, or even some red pepper flakes for a bit of a kick-- the possibilities are endless. The sauce is probably the best quick recipe I've come across in all my recipe searches, and its delicious over freshly cooked pasta if you just can't wait (oh, do I know that feeling!). This is an easy-peasy recipe and impossible to screw up, my friends.


Ah, it feels good to be back in Blogland :o)
x

Friday, May 21, 2010

bottom's up: Mexicola


A loooooong crazy week it has been, and I am ever so relieved that Friday has finally come! I have a fantastic weekend of music and mayhem ahead of me, so what better way to kick off this awesome weekend than with a fitting cocktail? I present to you the simpliest alcoholic beverage I've ever made: Mexicola.

I'm not a big drinker so, I never have a ton of spirits or mixers on hand when I'm in the mood for a drink-- and this is the perfect solution for such situations. A little tequila, a lime, some ice and a bottle of your favorite cola is all you need. 2 minutes later, you're ready for your own personal Happy Hour. Great by itself, with your favorite chips 'n dip, or accompanying grilled summer feasts. Naturally fitting for pre-gaming concerts, too.


Mexicola

{recipe from the Cocktail Bible}

Serves: 1

Ingredients:
  • 2 measures white tequila (I used about 1/2 a shot glass full)
  • 1 measure freshly-squeezed lime juice (from roughly 1/2 a lime)
  • cola of your choice
  • lime slice, to garnish (optional)
Fill half a tall chilled glass with ice. Pour the tequila and lime juice over ice, top off with cola. Stir gently and garnish with lime slice if desired.


Staying dry tonight? Leave out the tequila for a refreshing mocktail. Also feel free to swap the lime for lemon, for an equally delicious but slightly unexpected drink.

Have a GREAT weekend! x

Wednesday, May 12, 2010

viva terra summer lust

I am generally not one for [non-Etsy] wish lists of Things-that-I-want-but-don't-need from online retailers. Viva Terra has been the one exception for me, as I've been pining for their beautiful eco-conscious wares for several years now. Some of their products are a little on the pricey side... which is exactly why you wait for sales like these to pounce on long sought-after items. Because if its eco-friendly AND on sale, it is completely justifiable. Right. ;)

Here are a handful of things I've been lusting over. Bright or beachy, all of them are geared for summertime, and make me long for the picnics and barbecues that celebrate the season.

Bright:


Beachy:


I can't get over that ingenious stacked lunch box. Not only is it practical but, its totally adorable and available in *both* of my favorite colors! It will be mine, oh yes, it will be mine!
x

Monday, May 10, 2010

week night pasta for one

Cooking for one can be tricky. On nights when J is working late and I'm left to dine solo for the evening, I generally turn to something quick, easy, and inexpensive... which, normally leaves very little option for healthy or imaginitive (mac & cheese, anyone?) Last week, I found myself in this position but -with some leftovers, 2 store-bought ingredients, and a little creativity- I had a simple, tasty vegetarian dinner for one that didn't come out of a box. And it was still done in 20 minutes. Amazing, right? I thought so, too.


We tried chicken Milanese with arugula salad earlier last week with great results but, had some leftover greens and red onion... which made me think of this Real Simple dish I had stuffed in my recipe files ages ago. I also had that too-much-for-one-but-not-enough-for-two portion of gemelli leftover from a pasta salad of weeks passed; some handy chicken broth to sub for the wine and -$5 at Super Wal*Mart later- a small soft wedge of Brie and a carton of earthy creminis. It was meant to be.

I'm somewhat ashamed to admit it but, this was the first time I had *ever* cooked mushrooms or tried Brie cheese, and only the second time preparing arugula! I was rewarded for stepping out of my food comfort zone, though. The savory sauteed creminis and onions, peppery arugula and tangy Brie tossed with perfectly al dente gemelli was a delicious alternative to my stand-by boxed Annie's (I still love you though, Bernie!)


Gemelli with Brie, Arugula & Mushrooms

{adapted from Real Simple}

Serves: 1

Ingredients:

  • 1 heaping cup of dry gemelli, or other shaped pasta (penne, rotini, farfalle, ziti, etc.)
  • 1/4 cup reserved pasta cooking water
  • 1 tablespoon olive oil
  • 2-3 button or cremini, or 1 portobello mushroom, stems removed and caps cut into bite-sized wedges
  • 1/4 of a small red onion, sliced
  • 4 tablespoons chicken or vegetable broth (or dry white wine)
  • salt and pepper, to taste
  • 1/2 ounce of Brie, cut into small pieces
  • handful of fresh arugula, torn into bite-sized pieces
1. Cook the pasta according to the package directions. *Remember* to reserve 1/4 cup of the cooking water. Drain the pasta and return it to the pot.

2. While the pasta is cooking, heat the oil in a skillet over medium heat. Add the mushrooms and red onion, and cook 2-3 minutes tossing occassionally, until the mushrooms begin to release their juices. Add the broth (or wine), season with salt and pepper, and cook until the mushrooms begin to brown and the liquid reduces, about 5-6 minutes.

3. Mix the Brie pieces with the warm pasta so that they start to melt. Pour the reserved cooking liquid over the Brie to facilitate melting, and toss together until the cheese is completely melted and the pasta is coated (if your Brie is being stubborn, place the pot over a still-warm or low heat burner, mixing constantly, until it is fully melted). Stir in the sauteed mushroom-onion mixture. Add the fresh arugula, toss and serve.


Cooking for the fam? Check out the original recipe (serves 4).

Just a little FYI for you first-time fungus cooks like myself: button, cremini and portobello mushrooms are all the exact SAME species of mushroom, they're just picked at different points in their development. All are lovely and suited for this dish, though the smaller varieties (button and cremini) are the easiest to chop into perfectly bite-sized slices.


Do you have a favorite just-for-one recipe in your arsenal?

Share it with me in the comments! x 

Tuesday, May 4, 2010

at long last: sweet spring bounty


While it has -technically- been spring here in New England for the last month and a half, we have finally started experiencing that warm, sunny weather in more recent weeks... which means, we're just now getting a taste of all that wonderful spring produce that many of you in warmer climates have been enjoying for the past month. I was pleasantly surprised to find artichokes! and asparagus! and rhubarb! as I shopped for groceries last weekend, and it was a welcome sight. To celebrate, I made good use of some of this late spring bounty (and a strawberry sale!) with a nostalgic sweet spring salad.

Strawberries with spinach? Yes. An odd combination, I know. I remember trying this salad for the first time as a tween and being utterly horrified at first... and utterly wowed at the fact that leafy greens and juicy fruit make such a wonderful pair. The sweet poppy dressing marries these two ingredients so nicely, and really makes this a stand-out salad. It makes a fresh and interesting side dish for any warm-weather meal, and can hold its own as a light-but-delicious lunch.


Strawberry-Spinach Salad
with Sweet Poppy Dressing

{adapted from AllRecipes}

Serves: 4

Ingredients:

For the salad:
  • 10 ounces fresh spinach, rinsed, dried & torn into bite-size pieces (I just used baby spinach)
  • 1 quart of fresh strawberries, cleaned, hulled and sliced
  • 1/4 cup almonds, toasted and chopped or slivered
For the dressing:
  • 2 tablespoons sesame seeds
  • 1 tablespoon poppy seeds
  • 1/4 cup sugar
  • 1/2 cup olive oil
  • 1/4 cup balsamic vinegar
  • 1/4 teaspoon paprika
  • 1/4 teaspoon Worcestershire sauce
  • 1 tablespoon minced onion
  • 2 strips of cooked bacon, crumbled/finely chopped (optional)
1. In a medium bowl, whisk together all of the dressing ingredients until combined. Cover and chill for one hour.

2. In a large bowl, combine the spinach, strawberries and toasted almonds. Drizzle dressing over salad, and toss to coat. (It was recommended in the original recipe that the dressed salad be chilled for 10 minutes before serving but, I found this step unneccessary... and kinda gross.)


I'm thinking that adding some grilled chicken - perhaps glazed with a bit of that fantastic poppy dressing - would make an amazing summertime dinner with this salad. Further experimentation is needed. x

Wednesday, April 28, 2010

mmt ingredient challenge

In my favorite online community, I've helped launch a monthly creative challenge of sorts, just for fun and 'cause I'm into nerdy things like that. Last weekend, I was finally able to complete my Cooking Ingredient Challenge and I'd thought I share my entry here.

The challenge posed was basically to create a dish or a meal using ingredients from a list of 10 items-- the more included, the better. I ended up using 8 out of the 10 given ingredients in an unexpected Saturday lunch and I'm pretty happy with the results. The "fries" are definitely keepers-- crispy and flavorful without being overly indulgent. I was worried that they'd be limp and flavorless but, I didn't miss the deep fryer at all. 

Anyway, here 'tis! (With challenge ingredients in bold.)


 Turkey-Avocado Club Wrap
with Sweet Potato "Fries"

For the wrap:

Ingredients:

  • medium-sized flour tortillas
  • sliced roast turkey breast
  • sliced swiss cheese
  • lettuce
  • tomato, sliced
  • avocado, sliced, with a squeeze of lime
  • 1-2 slices of cooked bacon
  • mayonnaise, or condiment of your choice
Self explanatory but, just for good measure: spread a bit of whatever condiment you're using in the middle of the tortilla; layer the sliced turkey, swiss, lettuce, tomato, avocado and bacon as you see fit; tuck in the outer edges of the tortilla and roll up your wrap. Slice in half to serve.

Feel free to add in or substitute anything else that strikes your fancy-- some red onion, pickles, chipotle mayo, honey mustard, sliced ham, roast beef or tuna salad would be awesome in this, too.


 For the fries:

{recipe from Body+Soul}

Ingredients:
  • 2 sweet potatoes, skin on, scrubbed and cut into 4-inch sticks, about 1/2 inch thick
  • vegetable oil
  • 3 large egg whites
  • Mediterranean spice (oregano & thyme, salt, garlic powder)
1. Preheat oven to 450 degrees with racks in the upper and middle positions. Line two baking sheets with parchment paper and rub with oil.

2. Put sweet potatoes in a microwave-safe container, cover, and microwave 2 minutes. Stir gently, cover, and microwave 1 to 2 minutes more until pieces are pliable. Let rest 5 minutes covered.

3. In a large bowl, whisk egg whites until frothy, add spice mix, and whisk to blend. Working in batches, toss the sweet-potato pieces in the seasoned egg whites, letting the excess liquid drip back into the bowl. Place in a single layer on prepared baking sheets. Bake 10 minutes, then flip pieces over with a spatula. Rotate baking sheets from front to back and from one rack to the other. Bake until dark golden brown, about 15 minutes. Serve immediately.


You'll have to excuse the odd photo-- I just wanted to snap a quick pic so I could dig in! And now I'm craving those sweet potato fries again... x

Thursday, April 22, 2010

holy matrimony

Its hard for me to believe but, my husband and I celebrated our first wedding anniversary this week. And what a year it has been! I wanted to celebrate with a homemade dinner reminiscent of our fabulous Jamaican honeymoon: juicy roasted jerk chicken with ubiquitous rice and peas (Jamaica's version of beans 'n rice). Simple enough, right?

I sought out traditional Jamaican recipes.
I researched exotic ingredients and cooking methods.
I spent 2 days prepping-- chopping, grinding, marinating, soaking.
I followed the directions to a T.
And the resulting meal was AWFUL.

Looking back, I was naive to think that I could recreate the flavor of chicken that has been cooked in a specialized jerk pit and smoked to perfection by pimento wood, in my crappy electric stove. Its just not the same. There was something off about my jerk paste as well-- I suspect too much allspice, and no garlic or ginger (neither were in the recipe I used but, seemed to pop up in other jerk recipes I saw). As for the rice, I have no idea what the hell happened. The beans were under-cooked, the rice was over-cooked and the spice level rendered any salvageable morsels completely inedible. I pride myself on being a decent cook and this flavor fail was a major source of shame to me.

My saving grace was a simple fruit salad I found in my search for Jamaican recipes, called matrimony. (I mean, what better dessert could there be to celebrate the anniversary of our marriage than a dish called matrimony?) Traditionally this is made with oranges and star apple - a fruit native to Jamaica and next to impossible to find this far north - so this recipe substitutes a combo of pear and apple. The fruit is simply dressed and seasoned with just a pinch of nutmeg-- a light, lovely post-dinner treat. Or, in our case, dinner.


Matrimony

{recipe from Sky Juice and Flying Fish: Traditional Caribbean Cooking}

Serves: 6

Ingredients:
  • 1 ripe pear, peeled, cored & diced
  • 1 apple, peeled, cored & diced
  • 2 oranges, supremed
  • 1/4 cup condensed milk
  • grated nutmeg, to taste
  • (I also added a pinch of cinnamon, too)
1. Place the diced pear and apple in a medium bowl, add orange sections and mix. Sweeten with condensed milk and nutmeg, and toss to combine.

2. Let chill for at least one hour before serving. Serve chilled.


Thankfully, our meal turn-out was not reflective of our marriage and we were able to laugh off my disastrous attempt at authentic Jamaican cooking. Looks like we have yet another good reason to go back. x 

Tuesday, April 20, 2010

the cookie cure

Like I mentioned last week, I've been feeling a bit blue lately-- and what better cure for the blues than a batch of fresh-baked cookies? Not just any cookies, though. I needed something a little different... but still comforting and somewhat familiar. And thus, my Cure-All macadamia white chocolate chip cashew butter cookies were born.


I am in *love* with this flavor combination. My husband --who has a habit of dipping pieces of chocolate into peanut butter as a snack (weirdo)-- surprised me one day with a square of white chocolate dipped into some precious, coveted cashew butter. I'm not crazy about white chocolate but, it was so creamy and delicious that I had to make something with those two ingredients. And you just can't go wrong with cookies. EVER.


After experimenting with a few recipes, the best and final version is actually a modified JOC recipe for classic peanut butter cookies. Despite the difference in texture between traditional PB and cashew butter (the latter, like most natural nut butters, is more runny), the cookies still have the familiar crisp edges and rich gooey insides-- exactly what I was going for. The addition of white chocolate bits and roasted macadamia nuts sweetens the deal and gives these little beauties the perfect touch of crunch.


Cure-All Cookies

{adapted from JOC, 2006}

Ingredients:
  • 1 ½ cups all-purpose flour
  • ½ teaspoon baking soda
  • 1/3 cup unsalted butter, softened
  • ½ cup sugar
  • ½ cup packed brown sugar
  • 1 large egg
  • 1 cup cashew butter
  • ½ teaspoon vanilla
  • ¾ cup white chocolate chips
  • ¼ cup roasted macadamia nuts, coarsely chopped
1. Preheat the oven to 375°F. Grease or line 2 cookie sheets. Whisk the flour and baking soda together in a small bowl, and set aside.

2. In a large bowl, beat the butter and sugars together until well blended. Add in the egg, cashew butter and vanilla, and beat to combine. Stir in the flour mixture until blended. Gently fold in the white chocolate chips and chopped nuts.

3. Shape dough into 1-inch balls and arrange about 2 inches apart on the cookie sheets. Flatten dough with your fingers, a flat-bottomed glass, or a fork (don't skip this step or the cookies won't bake properly). Bake 1 sheet at a time, 10 to 12 minutes until the edges are golden brown. Allow cookies to set up on the sheet for a minute before moving to a wire rack to cool completely.


If you're not into cashews, substitute classic peanut, creamy almond or rich hazelnut butters. Also, feel free to swap out the white chocolate chips and macadamia nuts for semi-sweet chocolate bits, toasted cashews, slivered almonds, or whatever else you're craving-- go nuts :-)  
x

Friday, April 16, 2010

april showers...


The weekend is almost here! Yay!

Its due to rain 'round here all weekend long which, is kind of a bummer-- but all those pretty new blooms need waterin', right? I'm going to make the best of being indoors and get some long-postponed scrapbooking done. How 'bout you?

I'll leave you with some delicate spring blooms from my mom's garden: lovely lavender hyacinths and sweet violas. Because pretty fleurs make the rain worth enduring :-)

Until Monday! x